
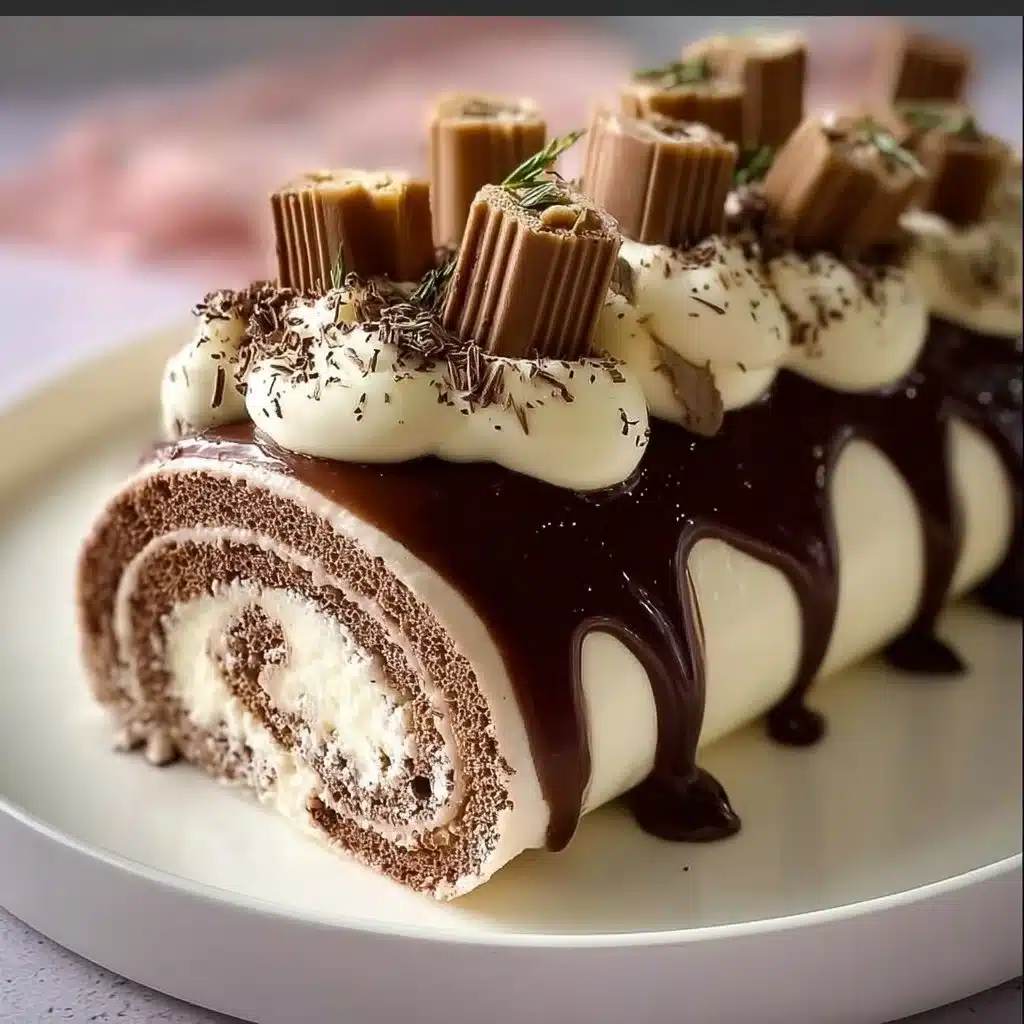
Elegant Chocolate and Cream Wafer Roll Cake
When I think about the Elegant Chocolate and Cream Wafer Roll Cake, I can’t help but feel a little bit giddy inside. There’s something magical about a dessert that combines the rich decadence of chocolate with the lightness of cream. I remember the first time I tried making this cake, and let me tell you, it felt like I was channeling my inner pastry chef. Whether you’re planning a celebration or just craving something sweet, this cake is sure to impress your family and friends.
Table of Contents
What Is Elegant Chocolate and Cream Wafer Roll Cake?
Elegant Chocolate and Cream Wafer Roll Cake is a delightful dessert that brings together layers of creamy goodness and a crunchy chocolate wafer base. Imagine biting into a soft yet sturdy cake filled with luscious cream, punctuated by that satisfying crunch from the wafers. It’s a treat that’s not only visually appealing but also offers a fantastic balance of flavors and textures. Plus, it’s relatively easy to make, which is always a win in my book!
Ingredients Overview for Elegant Chocolate and Cream Wafer Roll Cake
Here’s what you will need:
- Chocolate Wafers: These will create that wonderful rolled layer. You can use store-bought or make your own if you’re feeling adventurous.
- Heavy Cream: This is the star of your filling! It whips up beautifully for a light texture.
- Powdered Sugar: This adds sweetness to the cream and helps it hold its shape.
- Vanilla Extract: A splash of vanilla gives the cream filling a lovely flavor boost.
- Cocoa Powder: Use this for a rich chocolatey flavor both in the cream and for dusting the finished cake.
- Optional Decorations: Think chocolate shavings or fresh berries for that added touch of elegance.
Step-by-Step Instructions to Make Elegant Chocolate and Cream Wafer Roll Cake
1. Prepare the Cream Filling:
- In a mixing bowl, whip together the heavy cream, powdered sugar, and a splash of vanilla extract until you achieve nice soft peaks. This will make for a light and fluffy filling that’s perfect for the cake.
2. Assemble the Chocolate Wafers:
- Lay out your chocolate wafers side by side on a large piece of plastic wrap. You want to create a rectangle that will act as your rolling foundation.
3. Spread the Cream Filling:
- Carefully spread the whipped cream evenly over the wafers, leaving a little bit of a border around the edges. This ensures that when you roll it up, the filling won’t spill out.
4. Roll It Up:
- Using the plastic wrap, start at one end and gently roll the wafers into a log shape. Make it tight enough to hold together, but not so tight that it squishes the filling out.
5. Chill and Dust:
- Wrap the log in the plastic wrap and chill for at least two hours. After it’s firm, dust the outside with cocoa powder, and feel free to get creative with decorations like chocolate shavings.
Serving Suggestions
When you’re ready to enjoy this elegant treat, slice it into thick rounds and serve it on a beautiful cake stand. This cake pairs wonderfully with a cup of coffee or tea, making it a perfect dessert for an afternoon get-together or a special celebration. You can also add a dollop of extra whipped cream on top for a more indulgent experience.
Tips For The Perfect Elegant Chocolate and Cream Wafer Roll Cake
- Chill the Cream: Make sure your mixing bowl and beaters are cold for whipping the cream more effectively.
- Don’t Rush the Roll: Take your time when rolling the wafer log; a gentle touch will help keep it together.
- Add Your Twist: Feel free to fold in some grated chocolate or crushed berries into the cream for an extra layer of flavor.
- Storage: Keep any leftovers covered in the fridge, and it should stay fresh for a couple of days.
Q&A Section
Q: Can I use regular cream instead of heavy cream?
A: Heavy cream is best here for the texture, but you can substitute with whipping cream if that’s what you have on hand.
Q: Can I make this cake ahead of time?
A: Yes! In fact, it’s great to prepare it a day in advance as it allows the flavors to meld beautifully.
Q: What should I do if I can’t find chocolate wafers?
A: You can use crushed chocolate cookies or even graham crackers for an alternative that still brings great flavor.
Q: Can I freeze the cake?
A: You can freeze it, but make sure to wrap it tightly before freezing to avoid freezer burn. Thaw it in the fridge when ready to enjoy.
Why You’ll Love It
You will absolutely love making the Elegant Chocolate and Cream Wafer Roll Cake because it’s not only easy but also visually stunning! The combination of textures is hard to resist, and who wouldn’t want to serve a dessert that looks this impressive? Plus, it’s a crowd-pleaser; I’ve never met anyone who turned it down!
Behind The Scenes
While developing this recipe, I had a few ups and downs. The first time I made it, I tried to roll it too tightly, and let’s just say it was more of a messy explosion than an elegant cake. But after a few tweaks, I nailed it! The joy I felt when I finally got that perfect roll was unbeatable. If you’re ever looking for more delicious recipes, check out my Pinterest page at MyRecipeCast for all my culinary adventures!
So there you have it! Dive into making this Elegant Chocolate and Cream Wafer Roll Cake, enjoy every step, and don’t forget to savor those flavors!

Elegant Chocolate and Cream Wafer Roll Cake
Ingredients
For the Cake
- 2 cups Chocolate Wafers Store-bought or homemade
- 2 cups Heavy Cream For whipping
- 1/2 cup Powdered Sugar Adds sweetness and helps the cream hold its shape
- 1 teaspoon Vanilla Extract For flavor
- 2 tablespoons Cocoa Powder For dusting and flavor
- Optional Decorations: Chocolate shavings or fresh berries For serving
Instructions
Preparation
- In a mixing bowl, whip together the heavy cream, powdered sugar, and vanilla extract until you achieve nice soft peaks.
- Lay out the chocolate wafers side by side on a large piece of plastic wrap to create a rectangle.
- Carefully spread the whipped cream evenly over the wafers, leaving a border around the edges.
- Using the plastic wrap, start at one end and gently roll the wafers into a log shape.
- Wrap the log in the plastic wrap and chill for at least two hours.
- Dust the outside of the log with cocoa powder and add optional decorations like chocolate shavings before serving.