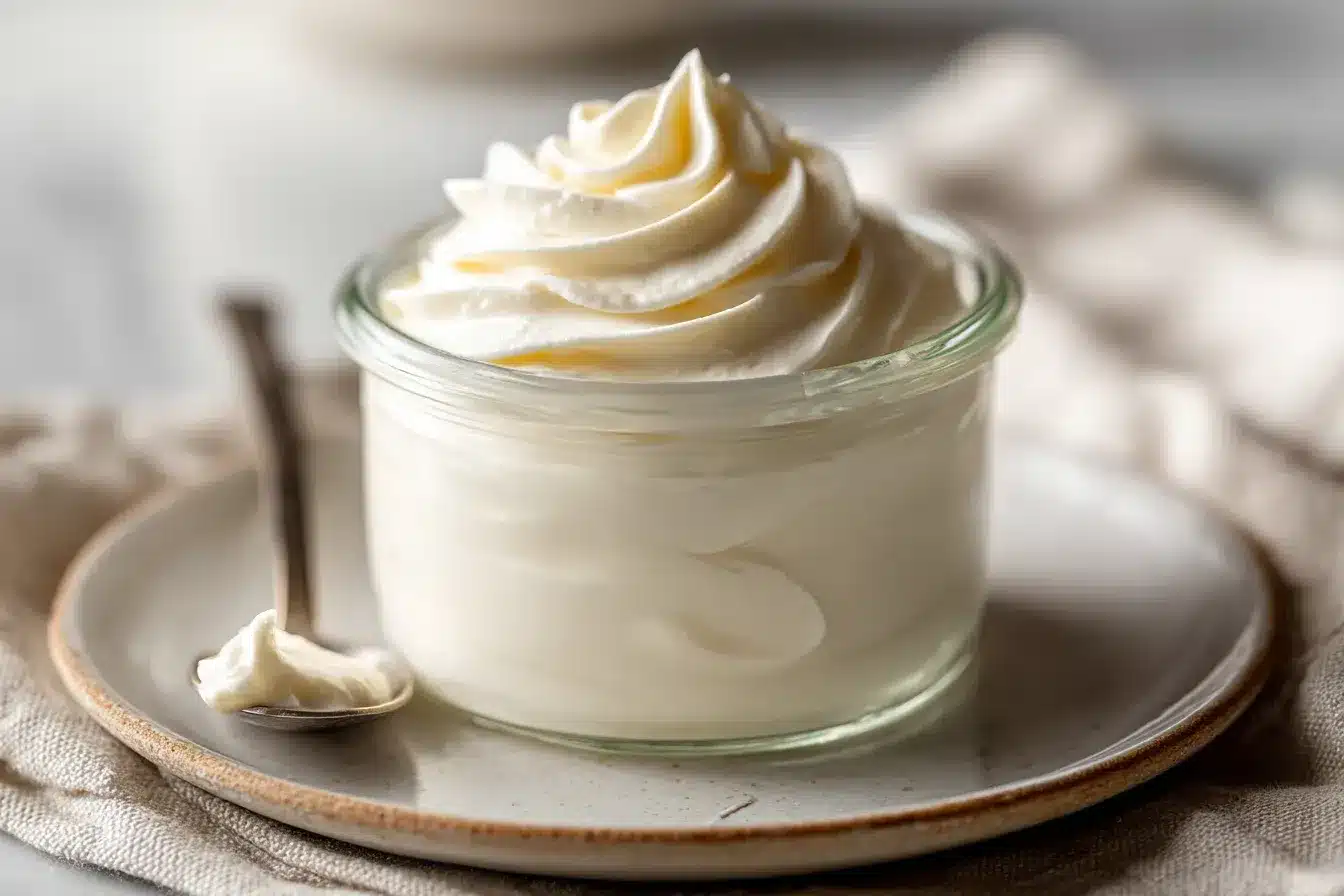
Homemade sour cream is honestly the best little kitchen trick I’ve picked up lately, and now I can’t imagine life without it. Ever had those nights when you’re halfway through baking or prepping nachos, only to realize there’s no sour cream in the fridge? Been there, way too many times. Now, with this easy homemade sour cream recipe, you’ll always have a stash ready to go. The best part? You only need heavy cream and a starter, and you can control the texture and tang.
This method is so simple, and you get a thick, luxurious sour cream that tastes miles fresher than anything you’ll find at the store. Plus, it’s perfect for topping my best fudgy brownies, whisking into dressings, or spooning over crispy nachos. Let’s get you set up with a batch!
Table of Contents
What Exactly Is Homemade Sour Cream?
Homemade sour cream is just what it sounds like: a creamy, slightly tangy spread made by fermenting heavy cream with a live starter, like buttermilk or lemon juice. The process is pretty magical, your cream thickens and sours, transforming into the classic topping you know and love, but fresher. I was convinced it would be complicated, but it’s actually one of the easiest things to make from scratch. You get to decide how zesty or thick it turns out, making it way more versatile than the tub you grab at the store. And honestly, it’s a total game changer for recipes like classic vanilla bundt cake or creamy dips.
Ingredients Overview
Heavy Whipping Cream: Go for pasteurized, not ultra-pasteurized, for the thickest texture. You can sub in light cream for a lighter result.
Buttermilk: This is your fermenting buddy. If you’re out, use plain yogurt with live cultures, or swap in a tablespoon of lemon juice or vinegar per cup of cream.
Substitutions:
- No buttermilk? Use lemon juice or vinegar instead, as above.
- Dairy-free? Try coconut cream and lemon juice, totally different, but really tasty on things like mango float.
- Craving extra tang? If you have a crème fraîche starter, use that for a sharper kick.
Step-by-Step: Making Your Own Sour Cream
1. Gather Your Ingredients
You’ll need 1 cup heavy cream and 2 tablespoons buttermilk (or use your favorite starter).
2. Mix
Pour the cream and buttermilk into a clean glass jar or bowl. Stir until fully blended.
3. Cover Loosely
Pop a clean towel or coffee filter over the jar and secure with a rubber band. Let it breathe!
4. Ferment
Let your jar sit at room temp (around 70°F) for 18-24 hours. It’ll thicken and develop that classic tang.
5. Refrigerate
When it’s nice and thick, cover with a lid and refrigerate for at least 4 hours. The texture will get even better.
6. Stir & Enjoy
Give it a gentle stir before serving. It keeps thickening in the fridge and is ready to use on everything from apple pie snickerdoodle cookies to homemade chili.
Ways to Use Homemade Sour Cream
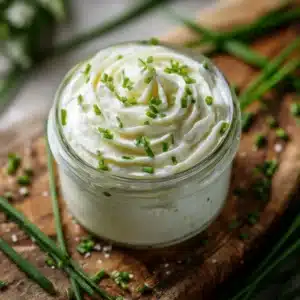
Homemade sour cream is basically my secret weapon for making simple dishes feel fancy. Dollop it onto baked potatoes, swirl into mashed potatoes, or spoon over piping hot sourdough focaccia. It’s perfect for creamy dips, just stir in herbs and garlic, or as a finishing touch on chili, tacos, or nachos. I even whisk it into cake and muffin batters for extra moisture and richness. When I need a quick dip for veggies or chips, a scoop of this with some chives totally does the trick. And honestly, I love it with blueberry muffin cookies for a tangy twist.

Tips for the Best Homemade Sour Cream
- Use fresh, high-quality cream for a richer flavor.
- Control the tang: Refrigerate earlier for milder flavor, or let it sit longer for more zing.
- If it’s too thin, let it culture a few hours more.
- Dairy-free? Coconut cream plus lemon juice gives a creamy, plant-based option.
- Make it ahead, your homemade sour cream will keep for up to 2 weeks in the fridge.
Homemade Sour Cream Q&A
What if my sour cream doesn’t thicken?
Just let it sit a bit longer at room temp. If it’s chilly in your kitchen, fermentation might take more time. Always use pasteurized (not ultra-pasteurized) cream for best results.
Is homemade sour cream safe?
Absolutely, as long as you use clean jars and utensils and refrigerate after culturing. It should smell pleasantly tangy and look thick. If you ever spot mold or it smells off, toss it.
Can I use something other than buttermilk as a starter?
Yes! Plain yogurt with live cultures or a splash of lemon juice or white vinegar works great.
How long will my homemade sour cream last?
Store it in a sealed container in the fridge, and it’ll keep for up to 2 weeks. Always use clean utensils when dipping in.
What Makes This Sour Cream Recipe Irresistible?
You’ll love this homemade sour cream for its unbeatable taste, texture, and crazy simplicity. Making it yourself means you control every detail, from thickness to tanginess. There’s no weird aftertaste or odd thickeners, just rich, creamy, tangy goodness you can whip up in minutes. Once you try this, I promise, those tubs from the grocery store just won’t hit the same.
More Creamy Recipe Ideas
- Chocolate Chip Cookies: Try a dollop of sour cream in the dough for extra softness.
- Best Gooey Pecan Pie Brownies: The tang cuts through the richness, so good.
- No-Bake Cookies and Cream Mousse Cake: Sour cream gives mousse a silky finish.
- Classic Pound Cake: Add some sour cream for unbeatable moisture.
- Lemon Blueberry Shortbread Bars: Swap sour cream for yogurt in the glaze for a twist.
Homemade Sour Cream
Equipment
- Glass jar or bowl
- Spoon
- Clean kitchen towel or coffee filter
- Rubber band
Ingredients
- 1 cup heavy whipping cream (pasteurized, not ultra-pasteurized)
- 2 tbsp buttermilk (or plain yogurt with live cultures, or 1 tbsp lemon juice/vinegar)
Instructions
- Pour heavy cream and buttermilk into a clean glass jar or bowl. Stir until fully combined.
- Cover jar with a clean kitchen towel or coffee filter. Secure with a rubber band, allowing air to flow.
- Let the mixture ferment at room temperature (about 70°F/21°C) for 18–24 hours, until thick and tangy.
- Once thick, cover jar with a lid and refrigerate for at least 4 hours before using. Stir before serving and enjoy!
Notes
Nutrition
Behind the Scenes: My Homemade Sour Cream Journey
The first time I tried making sour cream, I honestly expected a flop. I thought it would be complicated or taste too funky. But after letting it ferment overnight (and resisting the urge to peek every hour!), I woke up to a jar of the creamiest, dreamiest sour cream. There’s something so satisfying about stirring it together and knowing exactly what’s inside. I did try using ultra-pasteurized cream once, let’s just say, it didn’t thicken. Lesson learned: always check the label. My favorite part? Swapping buttermilk for yogurt and realizing it worked perfectly. Share your own tweaks and stories, and don’t forget to follow me on Pinterest for more kitchen inspiration!