Red velvet molten lava cake is officially my signature dessert and the star of every get-together at my house. I always say, nothing brings people to the table faster than the aroma of these gooey red velvet molten lava cakes fresh from the oven. My love for red velvet started early, but when I finally tried making my own molten lava cake version, it was a total game changer. This red velvet molten lava cake recipe is so much easier than you’d think, yet every bite tastes like you spent hours in the kitchen.
If you want to impress (and keep everyone coming back for seconds), red velvet molten lava cake will never let you down. By the way, I got a ton of inspiration after baking this single-serve red velvet cake for a midnight treat and realized a lava version would be pure magic.
Table of Contents
What Is Red Velvet Molten Lava Cake?
Red velvet molten lava cake is what you get when you cross the nostalgic flavors of classic red velvet with the gooey, molten core of a restaurant-style chocolate lava cake. Each cake is super moist, has the prettiest red crumb, and a dreamy melted chocolate center that oozes out when you dig in. These red velvet molten lava cakes are perfect for celebrations, date nights, or when you’re craving something extra special but want to keep things easy. It’s way more dramatic than red velvet cheesecake brownies, but just as simple to bake.
Ingredient Rundown: What You’ll Need for Red Velvet Molten Lava Cake
- Unsalted butter: Gives you that soft crumb and extra flavor. Dairy-free butter is great for swapping in.
- Bittersweet or semi-sweet chocolate: The heart of your molten center! Chocolate chips totally work, too.
- Eggs and egg yolks: The key to that rich, velvety lava texture.
- Granulated sugar: Makes every bite just sweet enough. Try coconut sugar for a subtle caramel note.
- All-purpose flour: Just enough to hold the lava cake together. Gluten-free 1:1 blend is my backup.
- Cocoa powder: Dutch or natural, just skip the hot cocoa mix.
- Red gel food coloring: For classic color. Beet juice works for a natural tint.
- Vanilla extract: Rounds out the flavor.
- Cream cheese (optional): Swirl into the middle for extra red velvet authenticity.
- Pinch of salt: Always brings out the chocolate.
Internal link example: I use the same technique for dusting my ramekins as I do with my ultimate chocolate raspberry fudge cake.
Step-By-Step Instructions for Red Velvet Molten Lava Cake
- Prep: Butter and dust four 6-oz ramekins with cocoa powder. No sticking allowed!
- Melt: Microwave butter and chocolate in 30-second bursts, stirring until glossy and smooth.
- Mix Wet: Whisk eggs, yolks, and sugar in a bowl until pale and fluffy. Add in vanilla and red coloring.
- Combine: Slowly whisk in your melted chocolate-butter mixture. Take your time here!
- Add Dry: Sift flour, cocoa powder, and salt in. Gently fold until smooth.
- Fill: Add half the batter to ramekins. Drop a spoonful of cream cheese in the middle (optional) and cover with remaining batter.
- Bake: Bake at 425°F (220°C) for 12–13 minutes. You want firm edges and a jiggly, molten center.
- Unmold: Cool 1 minute, then carefully run a thin knife around the edges and invert onto plates.
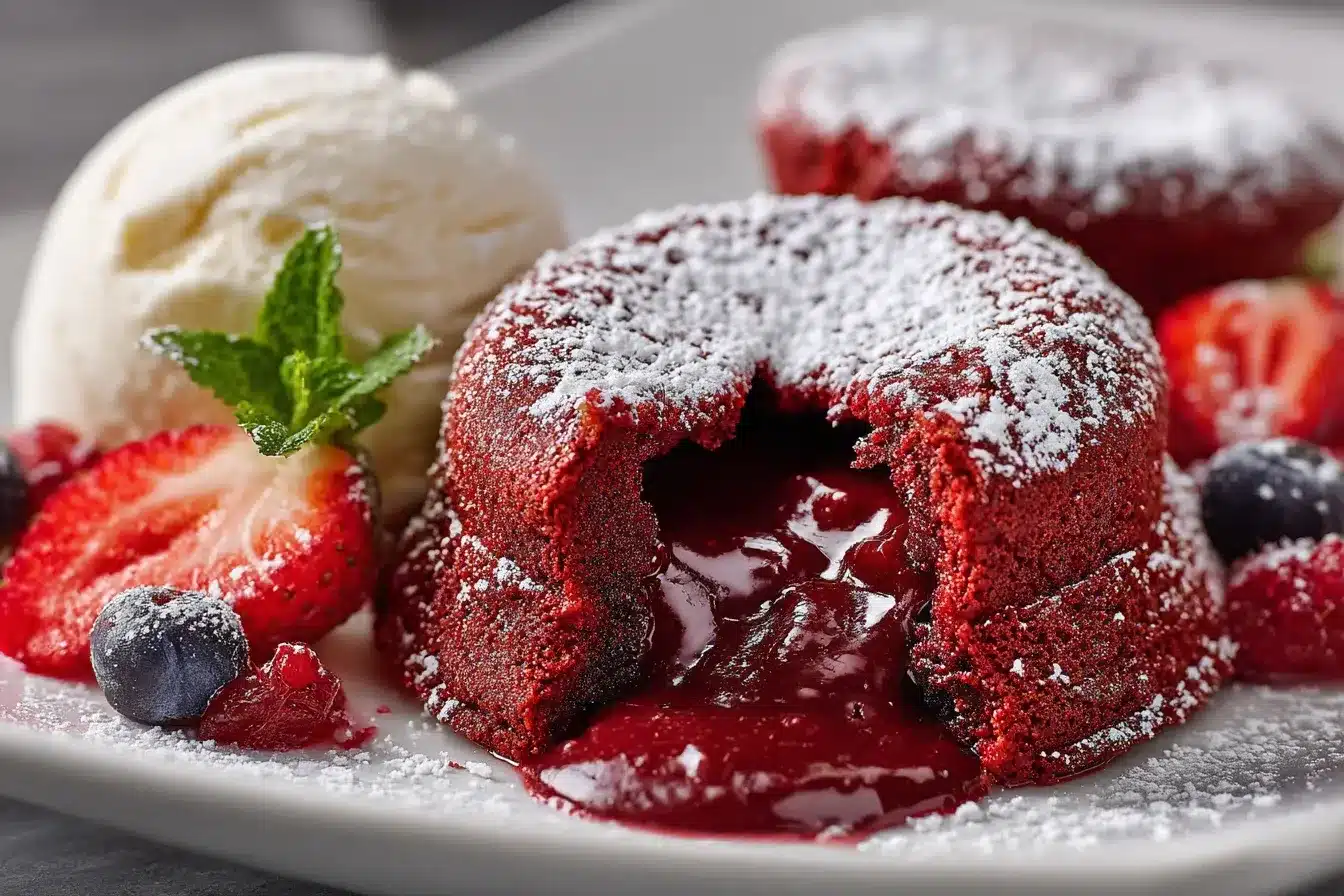
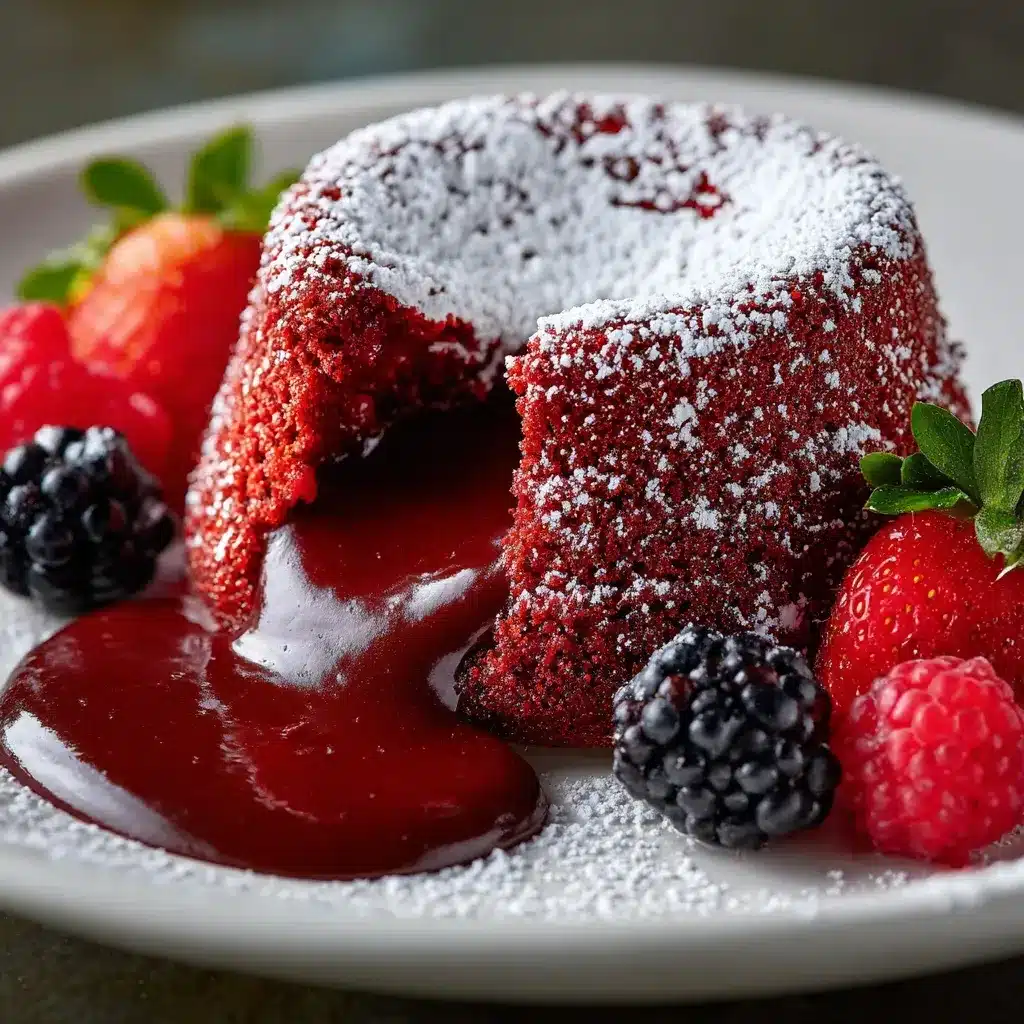
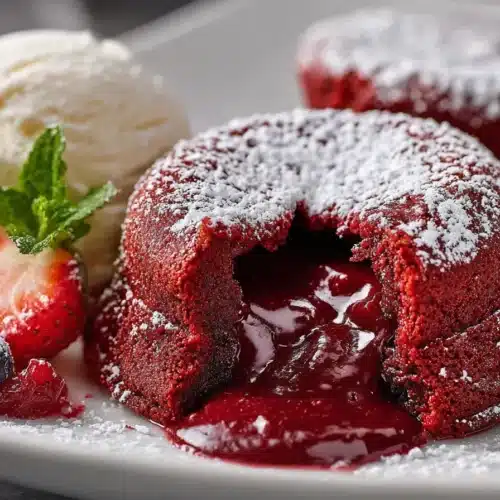
- Serve: Top your red velvet molten lava cake with ice cream, fresh berries, or a scoop of whipped cream.
Pro tip: You can prep ahead, refrigerate the filled ramekins, and just add 2 extra minutes to your bake time. It works the same way I chill the base for my no-bake mango ice cream cheesecake.
Serving Suggestions for Red Velvet Molten Lava Cake
Serve each red velvet molten lava cake hot from the oven, flipped onto a plate for that perfect chocolate lava reveal. I love adding a scoop of vanilla bean ice cream or a swirl of cream cheese frosting. Want more drama? Sprinkle on berries or chocolate shavings like you’d finish my classic vanilla bundt cake. They’re best eaten right away, while the center is still molten.
Tips for the Best Red Velvet Molten Lava Cake
- Always butter and dust ramekins so your cakes pop out easily.
- Use room temp eggs for a smoother batter.
- Want a bold chocolate note? Add a touch of espresso powder.
- Gluten-free flour blends work great, just like in my gluten-free red velvet pancakes.
- Don’t overbake! Check at the 12-minute mark for the perfect molten center.
Red Velvet Molten Lava Cake Q&A
How do I know when my red velvet molten lava cake is ready?
The edges should look set but the middle will jiggle a little, perfect for that lava flow.
Can I make red velvet molten lava cake ahead?
Yes! Fill and chill your ramekins, then bake straight from the fridge (add 2 minutes to bake time).
What’s the best way to get my cakes out?
Run a thin knife around the edge and invert with confidence. That cocoa-dusted ramekin makes all the difference.
Do I need food coloring?
No, you can skip it or use beet juice for a natural red tint. The flavor stays rich either way.
Why You’ll Love This Red Velvet Molten Lava Cake
Red velvet molten lava cake has all the classic red velvet flavor, a warm, gooey center, and a big “wow” factor every time you cut it open. This recipe is truly simple enough for beginners but impressive enough to make you the dessert hero. If you loved red velvet cheesecake brownies, this is the next step!
More Red Velvet & Chocolate Dessert Ideas
- Single-Serve Red Velvet Cake: Fast, easy, and perfect for one!
- Red Velvet Cheesecake Brownies: The ultimate fudgy, swirly treat.
- The Best Mocha Mousse Cake: Chocolate and coffee bliss.
- No-Bake Mango Ice Cream Cheesecake: Tropical and creamy with zero fuss.
- Best Oatmeal Chocolate Chip Cookies: Hearty, chewy, and always gone fast.
Behind The Scenes
Not gonna lie, my first batch of red velvet molten lava cakes was basically red velvet muffins (I overbaked them by 5 minutes). But that didn’t stop me. The next time, I nailed the gooey center and haven’t looked back. I love tweaking with different chocolates or a cream cheese swirl for more red velvet personality. If you want even more behind-the-scenes baking, check out my Pinterest for all my recipe experiments and kitchen mishaps!
Red Velvet Molten Lava Cake
Equipment
- 4 (6-oz) ramekins
- Microwave-safe bowl
- Whisk
- Mixing bowls
- Measuring cups and spoons
- Rubber spatula
Ingredients
- 1/2 cup unsalted butter (plus extra for greasing)
- 4 oz bittersweet or semi-sweet chocolate, chopped
- 2 large eggs
- 2 large egg yolks
- 1/3 cup granulated sugar
- 1/4 cup all-purpose flour
- 2 tbsp unsweetened cocoa powder
- 1 tsp vanilla extract
- 1/2 tsp red gel food coloring (or 2 tbsp beet juice)
- 1/4 tsp salt
- 2 oz cream cheese (optional, for swirl)
Instructions
- Grease four 6-oz ramekins with butter and dust with cocoa powder.
- In a microwave-safe bowl, melt butter and chocolate in 30-second bursts, stirring until smooth.
- In a medium bowl, whisk together eggs, yolks, and sugar until thick and pale. Mix in vanilla and red food coloring.
- Slowly whisk melted chocolate mixture into egg mixture until combined.
- Sift in flour, cocoa powder, and salt. Fold gently until just combined.
- Spoon half the batter into ramekins. If using, add a small dollop of cream cheese in the center of each, then cover with remaining batter.
- Bake at 425°F (220°C) for 12–13 minutes until edges are set and centers are just jiggly.
- Let cool for 1 minute. Run a thin knife around the edges and carefully invert onto plates. Serve immediately for the gooey lava effect!