
1.1K

# Easy Cherry Pie Bars: A Slice of Nostalgia

There's something incredibly comforting about nostalgic desserts, isn't there? I remember summers spent at my grandma’s house, where the air was sweet with the scent of cherries wafting from her kitchen. She often made cherry pie, letting the tartness of the fruit dance with the buttery crust. Today, I’m excited to share an easy and delightful twist on that classic—a recipe for Easy Cherry Pie Bars. They bring all those cherished memories into a convenient, shareable squared delight.

## What Makes These Bars Special?

What truly sets these cherry pie bars apart is their perfect balance of flavors and textures. You’ll savor the juicy tartness of the cherries combined with a tender, buttery crust and a crumbly top. Plus, the quicker prep time means you can have dessert on the table without spending all day in the kitchen. Trust me, this is a dessert you'll want to whip up repeatedly!

## Ingredients You'll Need

- **2 cups all-purpose flour** (you can substitute with gluten-free flour for a gluten-free version)
- **1 cup granulated sugar**
- **1/2 cup unsalted butter, softened** (or vegan butter for a plant-based option)
- **1/2 teaspoon salt**
- **3/4 teaspoon baking powder**
- **1 large egg** (flax egg or applesauce can work as an egg substitute)
- **1 can (21 oz) cherry pie filling** (you can also use homemade cherry filling!)
- **1 teaspoon vanilla extract**
- **Powdered sugar** (for dusting)

## Let’s Get Cooking

Begin by preheating your oven to 350°F (175°C). Grease a 9x13 inch baking dish. Then, in a mixing bowl, cream together the softened butter and sugar until light and fluffy. This will take just a few minutes and makes the base of your bars incredibly rich.

Add in the egg and vanilla extract, followed by the dry ingredients: flour, salt, and baking powder. Mix until it comes together into a dough. Don’t worry if it seems a bit crumbly—this is the texture you want!

Take about two-thirds of the dough and press it evenly into the bottom of your prepared baking dish. It doesn't have to be perfect; just aim for an even layer. Now, spread the cherry pie filling over this crust, ensuring even coverage.

Now, crumble the remaining dough over the cherry filling. You want a nice, rustic look, so don’t stress if it’s not uniform. Pop the dish into the oven for about 30-35 minutes, until the top is golden brown.

Resist the urge to dive right in! Let the bars cool in the pan for at least 10-15 minutes, then cut into squares and sprinkle with powdered sugar for that classic look.

## Serving Suggestions: How to Enjoy These Bars

These Easy Cherry Pie Bars are perfect for a cozy afternoon snack or when you need a sweet treat for a gathering. Serve them at your next picnic, where the cherry flavor will shine against the backdrop of nature. Pair them with a scoop of vanilla ice cream for an indulgent dessert experience, or enjoy them with a steaming cup of coffee to balance the tartness.

## Tips and Variations

- **Fruit Swap**: Feel free to switch it up! Use apple, blueberry, or even mixed berries instead of cherries for a fresh twist.
- **Vegan Options**: Replace the egg with a flax egg (1 tablespoon flaxseed meal + 2.5 tablespoons water), and use vegan butter instead of dairy.
- **Spice It Up**: Add a dash of almond extract for an extra layer of flavor that harmonizes beautifully with the cherries.
- **Make Ahead**: You can prepare the dough a day in advance and store it in the fridge. Just assemble and bake when you're ready!

## Q & A Section

**1. Can I use fresh cherries instead of canned?**
Absolutely! Just pit and chop fresh cherries, and you may need to add a bit of sugar to balance the tartness depending on their ripeness.

**2. How should I store these bars?**
Once cooled, store them in an airtight container at room temperature for up to 3 days or refrigerate for longer freshness.

**3. Can I freeze the cherry pie bars?**
Yes, they freeze beautifully! Wrap them in plastic wrap and store in an airtight container for up to three months. Thaw overnight in the fridge before serving.

**4. What if I’m gluten-free?**
Just substitute the all-purpose flour with a gluten-free blend that measures cup-for-cup!

## Behind The Scenes

When I first experimented with this recipe, I wasn’t sure how to balance the crumbly texture with the softness of the cherries. Initially, I overbaked them, resulting in a crumbly mess! After a few tries, I found that the perfect combination of time and temperature created these delightful bars, and I felt so accomplished when they came out golden and delicious!

## Final Thoughts

These Easy Cherry Pie Bars are perfect for family gatherings, picnic treats, or even just a cozy movie night at home. You can enjoy them warm from the oven or chilled for an afternoon snack. Depending on your mood, you might want to serve them with whipped cream or a scoop of your favorite ice cream.

I can't wait to hear how yours turns out! Grab your ingredients, and let’s make some memories together in the kitchen. Happy baking!
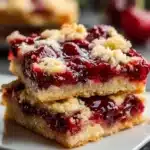
Easy Cherry Pie Bars
A delightful twist on classic cherry pie, these easy cherry pie bars combine juicy cherries with a buttery crust and a crumbly top, making for a perfect shareable dessert.
Ingredients
For the crust and topping
- 2 cups all-purpose flour can substitute with gluten-free flour
- 1 cup granulated sugar
- 1/2 cup unsalted butter, softened or vegan butter for a plant-based option
- 1/2 teaspoon salt
- 3/4 teaspoon baking powder
- 1 large egg can use flax egg or applesauce as an substitute
- 1 teaspoon vanilla extract
- Powdered sugar for dusting
For the filling
- 1 can cherry pie filling (21 oz) homemade cherry filling can also be used
Instructions
Preparation
- Preheat your oven to 350°F (175°C) and grease a 9x13 inch baking dish.
- In a mixing bowl, cream together the softened butter and granulated sugar until light and fluffy.
- Add the egg and vanilla extract, then mix in the dry ingredients: flour, salt, and baking powder until it forms a dough.
- Take about two-thirds of the dough and press it evenly into the bottom of the prepared baking dish.
- Spread the cherry pie filling over the crust, ensuring even coverage.
- Crumble the remaining dough over the cherry filling.
Baking
- Bake in the preheated oven for about 30-35 minutes, until the top is golden brown.
Cooling and Serving
- Let the bars cool in the pan for at least 10-15 minutes.
- Cut into squares and sprinkle with powdered sugar before serving.
Notes
These bars are wonderful for picnics or cozy snacks, and they can be served warm or chilled for a delicious treat. You can prepare the dough a day in advance and store it in the fridge.
Nutrition
Serving: 1gCalories: 250kcalCarbohydrates: 35gProtein: 2gFat: 12gSaturated Fat: 7gSodium: 200mgFiber: 1gSugar: 15g
Tried this recipe?Let us know how it was!