Table of Contents
Easy Turtle Bars: A Sweet Treat Just for You!
If you’re hunting for a delightful dessert that’s both simple and scrumptious, look no further than easy turtle bars. I remember the first time I tried a turtle bar—oh my goodness, the melt-in-your-mouth chocolate, gooey caramel, and crunchy nuts! It felt like a party in my mouth, and I thought, “Why haven’t I made these at home?” With this recipe, you can whip up a batch that’ll make everyone swoon, and hey, it’s so straightforward that you’ll be wondering why you waited so long to try it.
What Are Easy Turtle Bars?
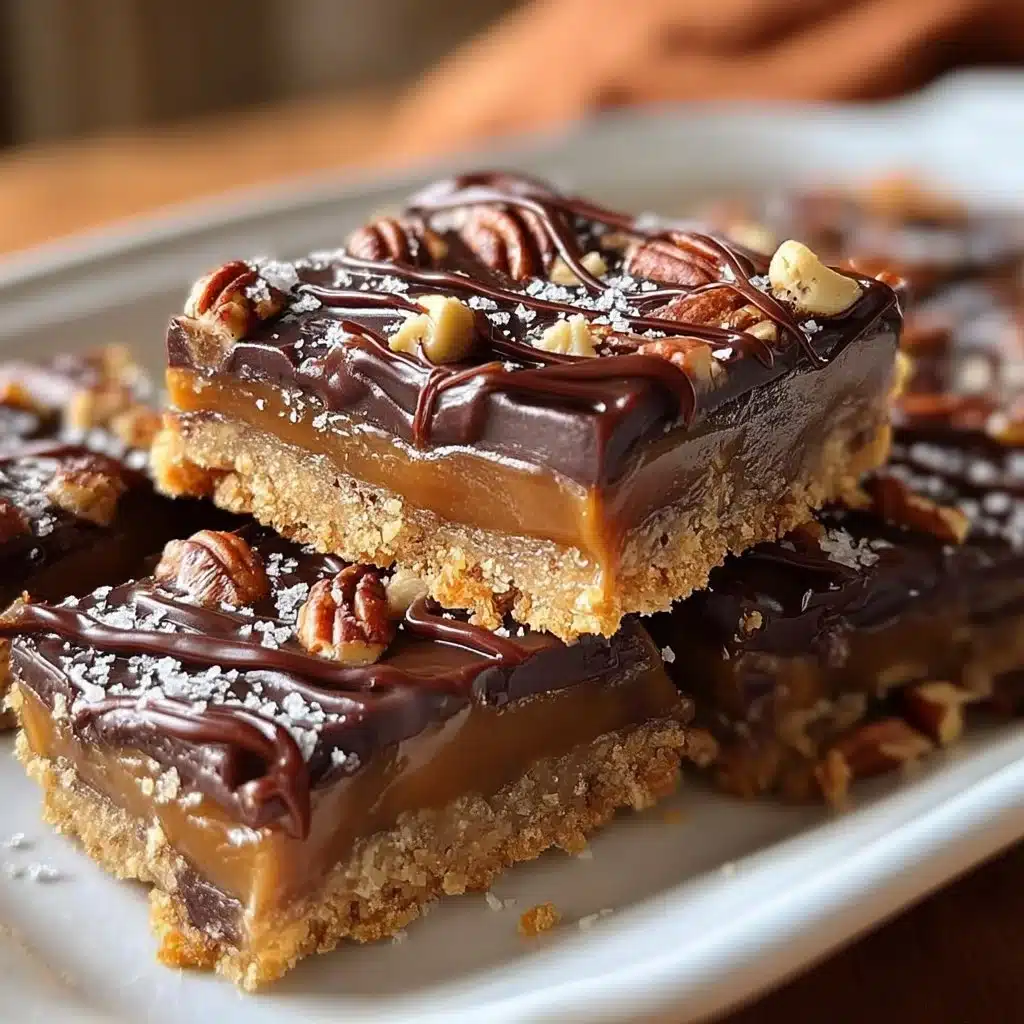
Easy turtle bars are essentially a delicious dessert that combines a cookie base with layers of caramel, chocolate, and nuts. They get their name from the classic turtle candy, which features the same tasty components. Generally served in a square or rectangular pan, these bars are perfect for casual gatherings or when you just want a little sweetness in your day. They are rich and chewy with a crispy edge, making each bite heavenly. Trust me; you’ll be the star of any occasion with this sweet creation!
Must-Have Ingredients for Easy Turtle Bars
Before we roll up our sleeves and get cooking, here’s what you’ll need to gather. Don’t fret if you don’t have everything; I’ll share some simple substitutions!
- Butter: 1 cup, softened. Butter gives that wonderful rich flavor. You could use margarine if you’re in a pinch, but I always prefer the taste of butter.
- Brown Sugar: 1 cup packed. This adds moisture and a lovely, caramel flavor. If you’re out, you can use white sugar but consider adding a tablespoon of molasses to mimic the taste!
- Egg: 1 large egg. This binds everything together. Flaxseed meal mixed with water can work as an egg substitute for a vegan option.
- All-Purpose Flour: 2 cups. It lends structure to the bars. If you’re feeling adventurous, go for whole wheat flour for a nuttier flavor.
- Baking Powder: 1 teaspoon. This is your leavening agent, ensuring your bars are nice and fluffy.
- Chocolate Chips: 1 cup. I love using semi-sweet chips, but dark chocolate or milk chocolate would also taste amazing.
- Caramel Sauce: 1 cup, store-bought or homemade. If you’re short on time, opt for store-bought. You can even use butterscotch sauce for a twist!
- Pecans or Walnuts: 1 cup, chopped. Nuts give it that crunchy, delightful texture. If you’re not a nut fan, feel free to skip them; they still taste great without!
Step-by-Step Guide: Making Easy Turtle Bars
Ready to bring these delicious bars to life? Here’s how:
- Preheat Your Oven: Start by preheating your oven to 350°F (175°C). This makes sure your bars bake evenly.
- Prepare Your Pan: Grease a 9×13-inch baking pan or line it with parchment paper for easy removal later.
- Mix the Wet Ingredients: In a large bowl, cream together the softened butter and brown sugar until it’s light and fluffy. This step is key for texture.
- Incorporate the Egg: Beat in the egg until fully combined. You want it to be smooth, so no lumps!
- Add Dry Ingredients: In another bowl, whisk the flour and baking powder together. Gradually add this mix into the wet ingredients, stirring until just combined.
- Spread the Mixture: Pour half of the cookie batter into your prepared pan and spread it evenly. You want a nice base for all those delicious toppings.
- Layer on the Goodies: Sprinkle the chocolate chips and chopped nuts over the batter. Drizzle the caramel sauce on top; it’s okay if some of it sinks into the mix!
- Add the Remaining Batter: Drop spoonfuls of the remaining cookie mixture on top, spreading it out a bit. It’s fine if not every bit is covered; that makes it rustic and charming.
- Bake: Pop the pan into the preheated oven and bake for about 25-30 minutes, or until the edges are golden brown and a toothpick comes out clean from the center.
- Cool and Cut: Let them cool completely before cutting into squares. I know it’s hard to wait, but trust me, it’s worth it!
Delectable Serving Suggestions
These easy turtle bars are super versatile! You can serve them at parties, with a scoop of vanilla ice cream on the side, or simply enjoy them with a cup of coffee for that sweet afternoon treat. They also make lovely gifts wrapped up in cute packaging, especially during the holidays or special occasions. You could even sprinkle some sea salt over the top for an added flavor boost—yum!
Pro Tips for the Ultimate Easy Turtle Bars
- Use Fresh Ingredients: Ensure your baking ingredients like baking powder and brown sugar are fresh for the best results.
- Don’t Overbake: Keep an eye on your bars as they bake. You want them chewy, so take them out when they’re just golden.
- Allow to Cool Completely: As tempting as it is, cutting them too early can lead to a crumbly mess. Patience is key here!
- Experiment with Toppings: You can swap out chocolate chips for peanut butter chips or add dried fruit for a fun twist.
Q&A Section
Can I make these turtle bars ahead of time?
Absolutely! You can prepare them a day in advance and store them in an airtight container at room temperature.
What if I’m allergic to nuts?
No worries! You can simply leave out the nuts, and your bars will still taste incredible.
Can I freeze the turtle bars?
Yes! They freeze beautifully. Just let them cool completely, wrap them tightly, and store them in the freezer for up to three months.
Can I use different kinds of chocolate?
Yes, you can mix and match! Dark, milk, white chocolate, or even flavored chips can add a fun twist.
Why You’ll Be Head Over Heels for These Bars
You’re going to love easy turtle bars because they combine delicious flavors and textures in one bite. The rich chocolate, creamy caramel, and crunchy nuts create such a delightful contrast. Plus, they’re so simple to whip up, perfect for any occasion, or just a lazy afternoon. You’ll find yourself making these time and time again. They’re not just sweet; they’re a comforting hug in dessert form!
Behind the Scenes of My Turtle Bar Adventure
Developing this easy turtle bars recipe was such a fun journey! It started with my craving for something sweet and a bit indulgent. The first few attempts were a little hit-and-miss—let’s just say my family had to eat quite a few experiments! At one point, I accidentally added too much flour, which made for a dry batch, but the caramel saved the day, bringing some moisture back. Now, I’m proud to say I’ve nailed it, and I can’t wait for you to try it out! Oh, and if you’re looking for more sweet inspiration, check out my Pinterest page here! It’s filled with all sorts of delightful ideas.
Now that you have everything you need, grab those ingredients and get baking! I can’t wait for you to experience the joy of easy turtle bars. Happy baking!
Easy Turtle Bars
Ingredients
Cookie Base
- 1 cup Butter, softened Can use margarine as a substitute.
- 1 cup Brown Sugar, packed Can substitute with white sugar and add 1 tablespoon of molasses.
- 1 large Egg Can substitute with flaxseed meal and water for a vegan option.
- 2 cups All-Purpose Flour Whole wheat flour can be used for a nuttier flavor.
- 1 teaspoon Baking Powder Ensure it is fresh for best results.
Toppings
- 1 cup Chocolate Chips Semi-sweet, dark, or milk chocolate can be used.
- 1 cup Caramel Sauce Store-bought or homemade; butterscotch sauce can be used for a twist.
- 1 cup Pecans or Walnuts, chopped Can be omitted if nut-free.
Instructions
Preparation
- Preheat your oven to 350°F (175°C).
- Grease a 9x13-inch baking pan or line it with parchment paper.
- In a large bowl, cream together the softened butter and brown sugar until light and fluffy.
- Beat in the egg until fully combined.
- In another bowl, whisk together the flour and baking powder, then gradually add this to the wet ingredients, stirring until just combined.
- Pour half of the cookie batter into your prepared pan and spread it evenly.
- Sprinkle the chocolate chips and chopped nuts over the batter, then drizzle the caramel sauce on top.
- Drop spoonfuls of the remaining cookie mixture on top and spread it out a bit.
Baking
- Bake for about 25-30 minutes, or until the edges are golden brown and a toothpick comes out clean from the center.
- Let them cool completely before cutting into squares.