Molten Chocolate Lava Cupcakes: A Sweet Adventure Awaits You
You’re in for a treat with these molten chocolate lava cupcakes! Seriously, if you’re a chocolate lover like me, imagine biting into a warm cupcake only to find a gooey, dreamy chocolate center just waiting to be devoured. It’s pure bliss! So, let’s dive into this delicious recipe that will have your friends begging for seconds, or, let’s be honest, just hoarding these little gems all to themselves.
Table of Contents
What Are Molten Chocolate Lava Cupcakes?
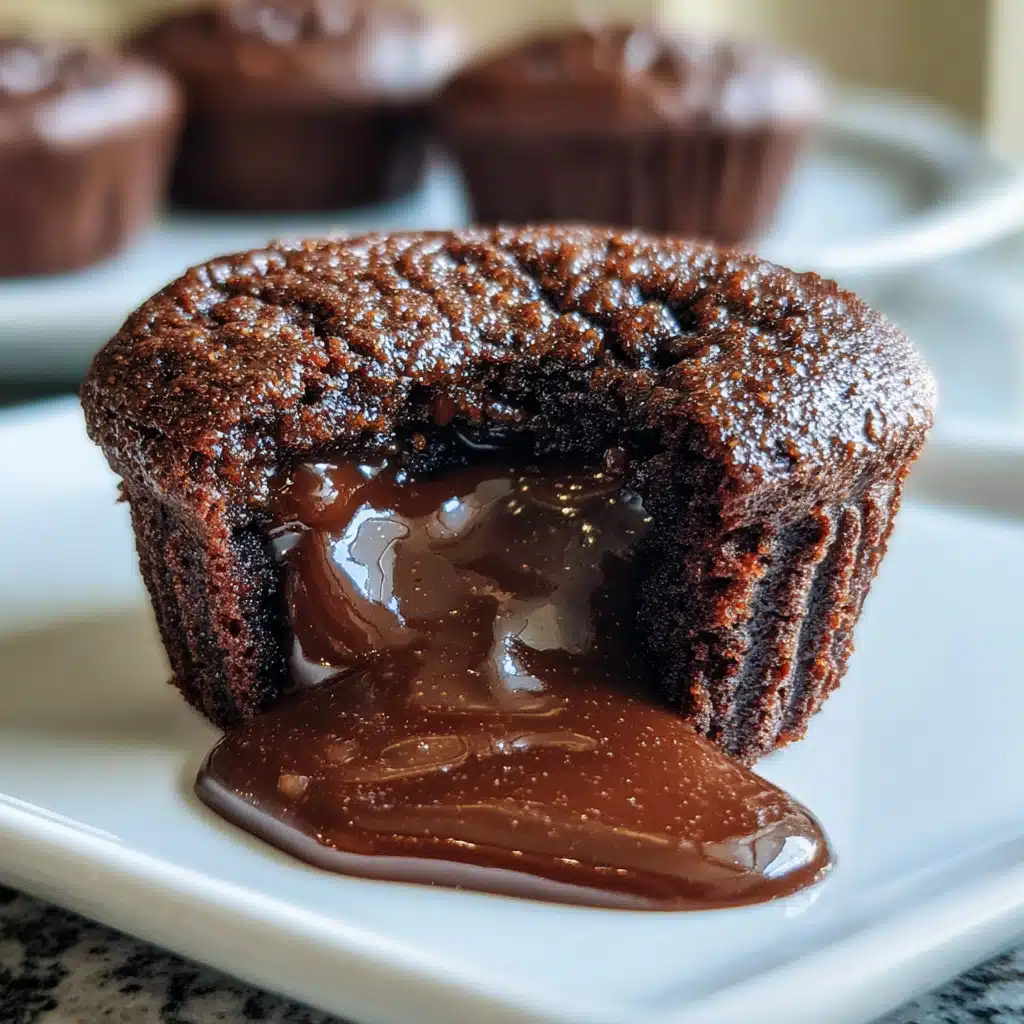
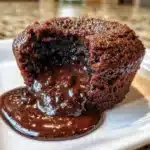
Molten chocolate lava cupcakes are like a chocolate lover’s dream come true! These delightful mini cakes are soft and fluffy on the outside, with a molten chocolate center that oozes out as soon as you take a bite. They’re often served warm and can be paired with ice cream or whipped cream for the ultimate indulgence. Honestly, it’s hard to mess these up. Once you master the basic technique, you can get creative with flavors and toppings!
Ingredients Overview for Molten Chocolate Lava Cupcakes
To whip up your own batch of molten chocolate lava cupcakes, here’s what you’ll need:
- Semi-Sweet Chocolate: The star of the show! This gives those cupcakes that rich flavor. You could also try dark chocolate for a more intense taste.
- Unsalted Butter: Adds moisture and makes everything velvety.
- Granulated Sugar: Sweetens things up; you can substitute this with coconut sugar for a healthier option.
- Eggs: They help bind everything together. If you’re vegan, you can utilize flax eggs as a substitute.
- Vanilla Extract: Just a splash for extra flavor. Almond extract also works great here!
- All-Purpose Flour: This gives structure. Gluten-free flour works too if you’re looking for alternatives.
- Salt: A pinch enhances the chocolate flavor. Kosher or sea salt will do the trick!
Step-by-Step Instructions to Make Molten Chocolate Lava Cupcakes
Now, let’s get down to the nitty-gritty! Here’s how you can bring these cupcakes to life:
- Preheat Your Oven: Set it to 425°F (220°C). Don’t skip this; it helps create that molten center.
- Melt the Chocolate and Butter: In a microwave-safe bowl, combine the chopped semi-sweet chocolate and butter, and microwave in 30-second intervals until melted. Stir until smooth.
- Mix in Sugar: Add granulated sugar and mix well until combined. You should see a shiny mixture.
- Add Eggs and Vanilla: Whisk in the eggs one at a time, followed by vanilla extract, ensuring everything is nicely mixed.
- Fold in Flour and Salt: Gently fold in the flour and salt until just combined. Be careful not to overmix!
- Prepare the Ramekins: Grease your ramekins with butter or cooking spray. This is crucial so they pop out easily later!
- Bake: Divide the batter among the ramekins and bake for about 12-14 minutes. They should look firm on the outside but a bit wobbly in the center.
- Let It Cool Slightly: Allow them to cool for about a minute before carefully inverting onto plates.
Serving Suggestions
These molten chocolate lava cupcakes have a magical quality all on their own, but serving them with a scoop of vanilla ice cream or a dollop of whipped cream takes it to another level—trust me! Drizzling some chocolate sauce or adding fresh berries could really elevate your dessert game. You could even sprinkle a little powdered sugar on top for that beautiful, fancy touch!
Tips for the Perfect Molten Chocolate Lava Cupcakes
- Don’t Overbake: The key to a gooey center is to pull them out when they still have a slight jiggle in the middle, so don’t feel bad about taking a peek!
- Room Temperature Ingredients: Make sure your eggs and butter are at room temperature for an even batter.
- Experiment with Flavors: Try adding a spoonful of espresso powder to the batter for a boost or some orange zest for fragrance!
- Use High-Quality Chocolate: It truly makes a difference in the taste, so splurge a little.
- Prepare in Advance: You can make the batter ahead of time and chill it. Just bake them when you’re ready to impress guests!
Q&A Section
-
Can I make these cupcakes ahead of time?
Absolutely! You can prepare the batter and refrigerate it. Just bake when you need them. -
What if I don’t have ramekins?
You can use muffin tins, but be sure to adjust baking time. -
Can I freeze them?
Yes! Once cooled, freeze them, and just reheat in the oven before serving for that ooey-gooey center. -
Will they set if I bake longer?
They will lose their molten center if you overbake them, so keep a close eye on the time!
Why You’ll Love It
You will love these molten chocolate lava cupcakes because they are the ultimate comfort dessert. They’re quick to make, requiring minimal ingredients, and they impress everyone, even those tricky foodies! Plus, there’s something so satisfying about watching the chocolate flow out when you take a bite. Seriously, it’s like bottled happiness.
Behind the Scenes
When I was developing this recipe, I had a couple of not-so-great tries where I either overbaked them or didn’t butter the ramekins enough, which led to some very sad cupcake disasters. But once I got it right, oh my goodness, the first bite was euphoric! Watching that chocolate ooze out was like a mini celebration. If you want to see more fun recipes and tips, check out my Pinterest page at MyRecipeCast for some inspo! Trust me; it’s worth a peek!
With all this deliciousness at your fingertips, are you ready to whip up these molten chocolate lava cupcakes? They’re absolutely perfect for any occasion—or just as a sweet treat for yourself after a long day. Happy baking!
Molten Chocolate Lava Cupcakes
Ingredients
Cupcake Ingredients
- 4 oz Semi-Sweet Chocolate Can substitute with dark chocolate for a richer flavor.
- 1/2 cup Unsalted Butter Adds moisture and richness.
- 1/2 cup Granulated Sugar Coconut sugar can be used for a healthier option.
- 2 large Eggs Can substitute with flax eggs for a vegan option.
- 1 tsp Vanilla Extract Almond extract works as a substitute.
- 1/4 cup All-Purpose Flour Gluten-free flour can be used for alternatives.
- 1/4 tsp Salt Kosher or sea salt enhances chocolate flavor.
Instructions
Preparation
- Preheat your oven to 425°F (220°C).
- In a microwave-safe bowl, combine chopped semi-sweet chocolate and butter. Microwave in 30-second intervals until melted and stir until smooth.
- Add granulated sugar to the chocolate mixture and stir until well combined.
- Whisk in the eggs one at a time, followed by the vanilla extract.
- Gently fold in the flour and salt until just combined, being careful not to overmix.
- Grease the ramekins with butter or cooking spray to prevent sticking.
Baking
- Divide the batter among the greased ramekins and bake for 12-14 minutes.
- Check that the cupcakes appear firm on the outside but still have a slight jiggle in the center.
- Allow them to cool for about a minute before carefully inverting them onto plates.