Table of Contents
Pumpkin Patch Dirt Cups
Okay, friends, let’s talk about Pumpkin Patch Dirt Cups. When autumn rolls around, nothing screams “fall fun” quite like these deliciously creepy yet adorable treats. I remember the first time I whipped up these little cups of joy. It was a chilly evening, and I wanted something that would bring a smile to everyone’s face. Trust me, these delightful desserts are not just sweet on the eyes; they are wickedly tasty too!
What Are Pumpkin Patch Dirt Cups?
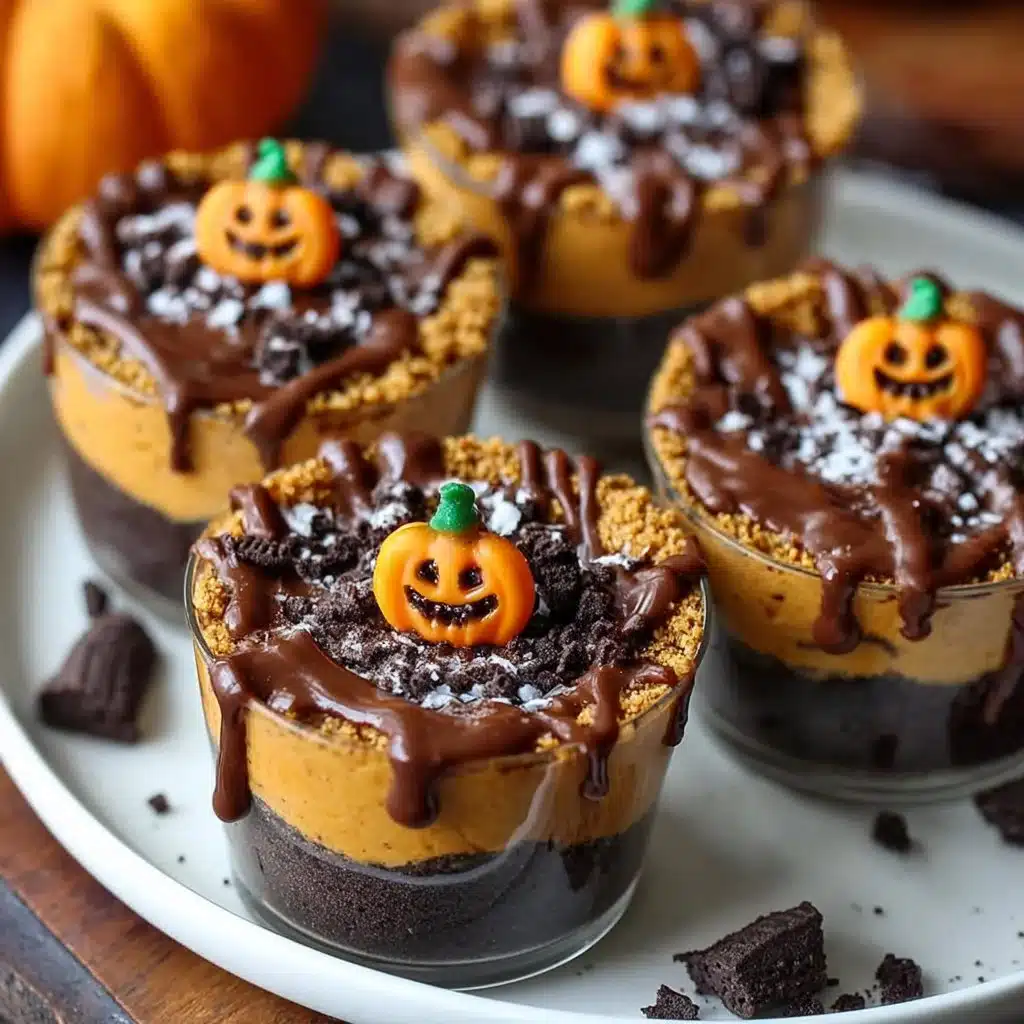
So, what exactly are Pumpkin Patch Dirt Cups? They’re basically a fun, no-bake dessert that combines layers of chocolate pudding, crushed cookies, and whipped cream, all topped with some pumpkin "decorations." They look like tiny pumpkin patches in a cup, making them a perfect treat for Halloween get-togethers or any fall celebration. Kids and adults alike will dig into these, making them a delightful treat for any gathering. Plus, you can totally customize them to match your style!
Ingredients Overview for Pumpkin Patch Dirt Cups
Navigating through the ingredient list could not be easier. Let’s break it down:
- Chocolate Pudding: The star of our dessert, giving it that rich, chocolatey flavor. You can use instant pudding for a quicker version.
- Crushed Oreos: These give the “dirt” effect, adding a crunchy texture. But if Oreos aren’t your jam, any chocolate cookie will do!
- Whipped Cream: This adds a light, fluffy layer that balances out the richness of the pudding. You can use store-bought or make your own with heavy cream.
- Candy Pumpkins: These are adorably cute on top! If you can’t find them, orange gummy candies also work well.
- Plastic Cups: You can use any that you have lying around. It’s all about creativity, and I prefer to use clear cups to showcase those fabulous layers!
Step-by-Step Instructions to Make Pumpkin Patch Dirt Cups
- Prepare the Pudding: Following the instructions on the box, whip up that chocolate pudding. In less than 5 minutes, you’ll have a creamy base. Can it get any easier?
- Crush the Cookies: Place your cookies in a zip bag and crush them with a rolling pin. The kids can help with this; it’s ridiculously satisfying!
- Layer the Ingredients: In your plastic cups, start with a layer of chocolate pudding at the bottom, then add a layer of crushed cookies. Repeat this until your cups are filled.
- Top with Whipped Cream: Slather on a generous dollop of whipped cream at the top. Think snow-capped mountains, just delicious!
- Add the Pumpkins: Stick a few candy pumpkins on that fluffy cloud of cream, and voilà! Your Pumpkin Patch Dirt Cups are ready to be enjoyed.
Serving Suggestions
These Pumpkin Patch Dirt Cups are perfect for parties, potlucks, or just a fun family dessert night. Set them out in a festive display, maybe with some autumn leaves or a cute sign saying “Pumpkin Patch.” You could even serve them alongside other fall treats like apple cider donuts to create a mini dessert station. Seriously, they make every occasion feel extra special!
Tips for the Perfect Pumpkin Patch Dirt Cups
- Make Ahead: You can prepare the pudding a day in advance. Just keep it covered in the fridge to maintain its fresh, creamy consistency.
- Mix and Match: Feel free to mix up the layers! You can add chocolate chips or even a layer of caramel sauce if you’re feeling adventurous.
- Size It Up: If you’re serving a crowd, consider using mason jars for a rustic twist on presentation.
- Experiment with Flavors: What about vanilla pudding with crushed graham crackers for a “beach day” theme? The options are endless!
Q&A Section
1. Can I use homemade pudding instead of instant?
Absolutely! Just make sure it’s well chilled before layering.
2. How long will these last in the fridge?
They are best eaten within 2 days, but they can last up to 3 if stored properly in an airtight container.
3. What if I don’t have candy pumpkins?
No worries! Use any fall-themed candy or even chocolate candies instead.
4. Can I use dairy-free options for this recipe?
Of course! There are great dairy-free puddings and whipped toppings available; just check the labels.
Why You’ll Adore Them
You just can’t go wrong with Pumpkin Patch Dirt Cups! They are not only irresistibly delicious but also visually appealing—making them a hit with guests of all ages. Plus, let’s not forget the fun factor; this is an activity you can share with your kids or friends, making memories while you whip up this tasty treat. The flavor is rich, the presentation charming, and let’s face it, they totally capture the spirit of seasonal fun!
The Journey Behind the Recipe
Oh my goodness, let me tell you—this recipe didn’t come together overnight. I remember the very first time I tried to make these. I kind of got a bit carried away and ended up with way too much pudding spilling everywhere! After a few messy attempts, I finally nailed the layering technique. The best part? Watching everyone’s eyes light up when they saw the final results. I totally recommend checking out my Pinterest page at MyRecipeCast for some fun ideas, tips, and eye candy of all my delicious adventures. So go on, gather your ingredients, and bring a little autumn magic into your kitchen with these delightful Pumpkin Patch Dirt Cups!
Pumpkin Patch Dirt Cups
Ingredients
Layering Ingredients
- 2 cups Chocolate Pudding (instant) Can use homemade pudding if desired.
- 15 cookies Crushed Oreos or any chocolate cookie Adds the 'dirt' effect.
- 2 cups Whipped Cream Can use store-bought or homemade.
Toppings
- 10 Candy Pumpkins Can substitute with orange gummy candies.
Serving Supplies
- 4 Plastic Cups Clear ones are preferable to showcase layers.
Instructions
Preparation
- Prepare the pudding by following the instructions on the box.
- Crush the cookies in a zip bag using a rolling pin.
- Layer the ingredients in the cups: start with chocolate pudding, then add crushed cookies, and repeat until the cup is filled.
- Top with whipped cream generously.
- Add candy pumpkins on top of the whipped cream.