Table of Contents
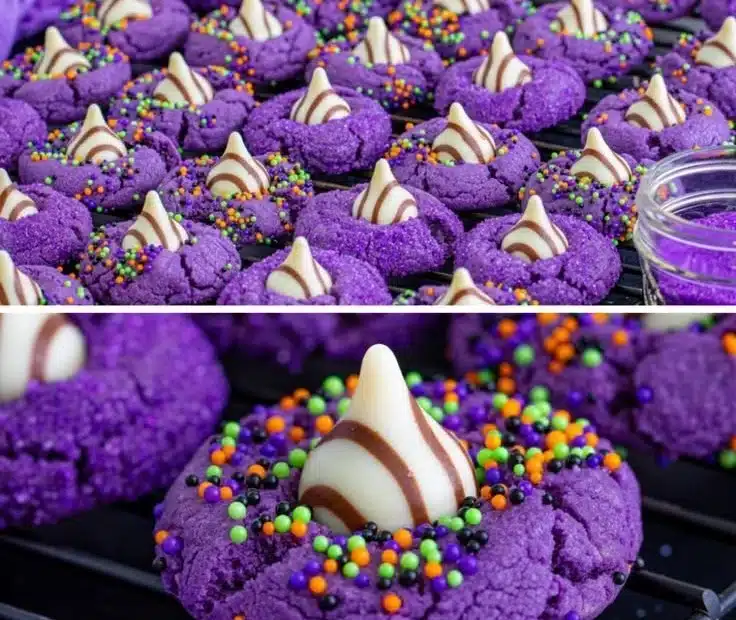
Witchy Cookies for Halloween!
As Halloween approaches, I’ve got to share my absolute fave treat: witchy cookies! They’re not just cookies; they’re little bits of magic that add all the fun to this spooky season. Imagine a crispy edge and a soft, chewy center with just the right hint of sweetness. It’s honestly impossible to eat just one. So, grab your broomsticks and let’s conjure up some deliciousness together!
What Are Witchy Cookies?
Witchy cookies are magical treats filled with whimsy and charm! These delightful cookies are often decorated with spooky designs and colorful icing. Great for kids and adults alike, they can be shaped like witches, brooms, or even cauldrons. Perfect for Halloween, these cookies allow your creativity to soar, making them a festive treat that everyone will love. You’ll definitely want to make these for your next Halloween bash!
Ingredients Overview for Witchy Cookies
- Flour: The base of any cookie recipe. I usually go for all-purpose flour, but whole wheat works too if you’re feeling adventurous.
- Butter: Adds richness and that yummy, melt-in-your-mouth texture. You could swap this with coconut oil for a dairy-free version.
- Sugar: A must for sweetness! I like using a mix of brown and granulated sugar for flavor depth.
- Egg: Brings everything together. If you’re vegan, use a flax egg instead! Just mix one tablespoon of ground flaxseed with three tablespoons of water and let it sit a few minutes.
- Baking Soda: Helps the cookies rise and gives them that soft texture. Don’t skip it!
- Vanilla Extract: This adds a warm flavor. I love pure vanilla, but imitation works too.
- Food Coloring: Use to bring your spooky designs to life! Go for black, green, or orange—whatever you fancy.
- Sprinkles: These give your cookies that festive crunch! You can use Halloween-themed sprinkles for extra flair.
Step-by-Step Instructions for Witchy Cookies
- Prepare your ingredients: Preheat your oven to 350°F (175°C) and line a baking sheet with parchment paper.
- Mix the butter and sugars: In a large bowl, cream together butter, brown sugar, and granulated sugar until fluffy. It should look light and airy—this is a crucial step!
- Add the egg and vanilla: Beat in the egg and vanilla extract until combined. It creates a lovely, smooth mixture.
- Combine the dry ingredients: In another bowl, whisk together flour, baking soda, and a pinch of salt. Gradually add it to the wet mixture, stirring until just combined.
- Color it up: Split the dough into portions (depending on how many colors you want), and mix in your food coloring. Don’t hesitate to go bold!
- Shape the cookies: Roll the dough into balls and place them on the baking sheet. You can flatten them slightly to help them spread.
- Bake: Pop them in the oven and bake for about 10-12 minutes or until golden. Keep an eye on them—no one likes a burnt cookie!
- Let them cool: Allow the cookies to cool on the baking sheet for a couple of minutes before transferring to a wire rack. This is where the magic happens!
Serving Suggestions
Once your witchy cookies are ready, you can serve them up in so many fun ways! Arrange them on a spooky platter with fake spiders for a Halloween party, or pack a few into little treat bags for trick-or-treaters. How about pairing them with a glass of chilled almond milk? Trust me; the combo is to die for! You could even get creative and use them as toppers for Halloween-themed cakes.
Tips For The Perfect Witchy Cookies
- Don’t overmix: Once you add your dry ingredients to the wet mix, stir only until combined. This keeps your cookies tender.
- Chill the dough: If you have time, chilling the dough for about 30 minutes helps with shaping and can enhance the flavors.
- Experiment: Feel free to add in chocolate chips or nuts for a little extra crunch.
- Play with shapes: Get fun cookie cutters or simply use your hands to shape them into spooky creatures!
Q&A Section
1. Can I make witchy cookies ahead of time?
Absolutely! You can prepare the dough ahead of time and chill it for up to three days. Just let it sit out for a few minutes before baking.
2. How do I store these cookies?
Store them in an airtight container at room temperature for up to a week. They’ll still taste great!
3. What can I substitute for butter?
Coconut oil works fantastic, or you could use a vegan butter substitute for a dairy-free version.
4. Can I freeze witchy cookies?
Definitely! Bake them, let them cool, and then store in a freezer-safe bag. They will keep for about three months. When you’re ready, just thaw and enjoy!
Why You’ll Love Them
You’ll love witchy cookies because they add a dash of magic to your Halloween festivities! They’re not only fun to make but also a blast to decorate. Every cookie is a canvas for creativity, whether you go for spooky faces or colorful designs. Plus, they taste absolutely divine, with the perfect balance of sweetness that melts in your mouth. These treats will surely put a smile on everyone’s face—trust me!
Behind The Scenes
Creating these witchy cookies was a delightful experience! I had a few hiccups along the way, like the time I added too much food coloring and ended up with green dough that looked a bit more like slime than cookies. But that’s part of the fun, right? Each batch turned out better than the last as I learned what worked for me. I love sharing my recipes on my Pinterest page here for even more spooky inspiration! Baking is about enjoying the process, and I hope you feel inspired to spread your Halloween creativity with these witchy cookies!
Happy baking, and may your Halloween be full of fun and delicious treats!
Witchy Cookies
Ingredients
Dry Ingredients
- 2 cups all-purpose flour Whole wheat flour can be used as an alternative.
- 1 teaspoon baking soda
- 1 pinch salt Optional, to enhance flavor.
Wet Ingredients
- 1 cup unsalted butter Can substitute with coconut oil for dairy-free version.
- 1/2 cup brown sugar For flavor depth.
- 1/2 cup granulated sugar
- 1 large egg Can substitute with a flax egg for vegan version.
- 1 teaspoon vanilla extract Pure vanilla preferred.
Decorative Ingredients
- a few drops of food coloring Choose colors like black, green, or orange.
- to taste Halloween-themed sprinkles For decoration.
Instructions
Preparation
- Preheat your oven to 350°F (175°C) and line a baking sheet with parchment paper.
- In a large bowl, cream together butter, brown sugar, and granulated sugar until fluffy.
- Beat in the egg and vanilla extract until combined.
- In another bowl, whisk together flour, baking soda, and a pinch of salt. Gradually add it to the wet mixture, stirring until just combined.
- Split the dough into portions for coloring and mix in your food coloring.
- Roll the dough into balls and place them on the baking sheet, flattening them slightly.
Baking
- Bake for about 10-12 minutes or until golden.
- Allow the cookies to cool on the baking sheet for a couple of minutes before transferring them to a wire rack.